May 29, 2014
After an awesome time in New Zealand, I returned to Australia for three more days. My first stop was in Adelaide for a day and a half. I had a business meeting the day I landed, leaving me with nothing to do for the remainder of the next day while I waited for a 7 pm flight. I had contacted Royal Adelaide G.C. a month or so prior, and they advised the only day I was in town was scheduled to host a women's members' event. Fortunately for me, the staff is awesome and they found a timeframe between two groups of members and advised me to come on out.
 |
| The front entrance gate into the club. |
 |
| The sign mounted on the left wall of the entrance gate. |
The golf club was founded in 1870 and is the oldest golf club in Australia. It was first laid out in 1903 and the original designers were H.L. Rymill, and C.L. Gardiner. Like many of the great courses in Australia, the course was changed by Dr. Alister MacKenzie in 1926. In the middle of MacKenzie's Melbourne visit he traveled by train to Royal Adelaide for four days.
The clubhouse is nice for its age. It isn't extreme or lavish in any way, but it is functional and open.
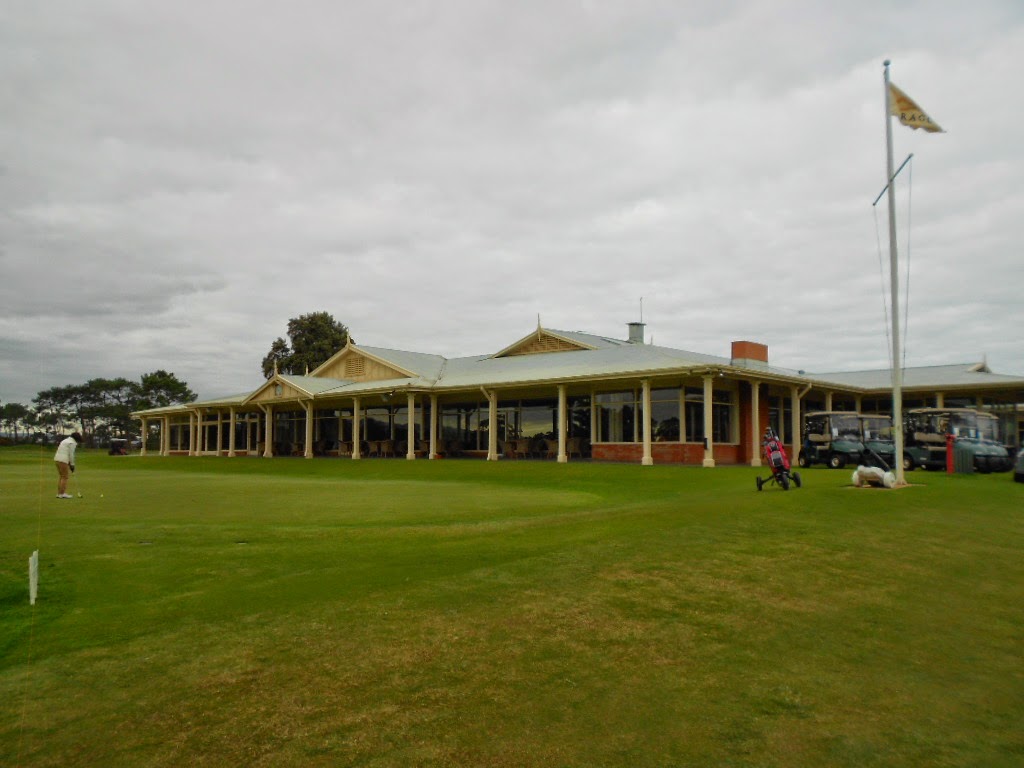 |
| The clubhouse at R.A.G.C. |
 |
| The gentlemen's locker room at R.A.G.C. |
 |
| The flag pole and club flag located next to the clubhouse. |
One of the things immediately noticeable at Royal Adelaide is the Grange-to-Adelaide train line. It runs through the middle of the course including right by the club house and first hole. It is a pretty active train line. I lost count at 14 trains that passed through during my round. There are warning signs, since there are no protective gates, because train is only twenty to thirty yards from the 13th green.
 |
| The warning signs located in numerous locations throughout the course. |
 |
| The clubhouse (distant left) sits just off the train tracks. |
 |
| A train passing through between the first and second holes. The clubhouse can be seen in the distance. |
R.A.G.C. had the unfair advantage of having to follow up my experiences at both
Cape Kidnappers and
Kauri Cliffs. It isn't that Royal Adelaide isn't well maintained. The care and attention to the course are readily apparent. It is just difficult to compete against the #38 and #74 courses in the world, and arguably the best golf courses anywhere in New Zealand, and that also have stunning ocean and cliff vistas on multiple holes. With that said, I try to be as objective as I can when judging a course. For any course ranked in the top 100 of the world, I generally expect near immaculate roughs, fairways, and greens, and top notch staff. The proshop staff was friendly enough, but i couldn't get the attention of the restaurant staff after waiting for 15 minutes so I just left. I suspect they were so busy with their members' event that it is definitely excusable. The fairways were in good shape, and the greens were what I have come to expect of top 100 courses, but once you got into the rough and away from the fairway, there were some very definite bad spots. It looked as if some areas had just been neglected. Of course, it was the start of winter season so it cold have been a rough summer. But, I was unable to find a grounds crew person to ask.
Royal Adelaide appears numerous times throughout The World's 500 Greatest Golf Holes and receives quite a few accolades. Among them are:
- Hole 14 is listed as one of the top 100 holes in the world.
- Hole 3 is listed as one of the best 18 holes in Australasia and Japan.
- Hole 14 is listed as one of the best 18 holes in Australasia and Japan.
- Hole 15 is listed as one of the best 18 holes in Australasia and Japan.
- Hole 14 is listed as one of the 18 most difficult holes in the world.
- Hole 3 is listed as one of the 18 best short par 4s in the world.
- Hole 15 is listed as one of the best 18 holes in Australasia and Japan.
- Hole 3 is listed as one of Alister MacKenzie's best 18 holes on the planet.
- Hole 14 is listed as one of Alister MacKenzie's best 18 holes on the planet.
 |
| The flag on each hole at R.A.G.C. |
Hole one is a short Par 4 345 meter hole that curves between some gentle mounds on each side. In the mounds on the right side are two bunkers clearly visible from the tee.
 |
| A look down the fairway from the 1st tee box. |
 |
| A closer look at the right side fairway bunkers. |
The green is guarded by a bunker on its front left side. As a south westerly wind is often assisting this hole, players may have difficulty, even with a short iron, placing their second shots close to the flag.
 |
| A look into the 1st green from 80 yards out. |
The par 5, 498 meter second hole has the men's tee box located across the railroad tracks and hitting back across them onto the fairway. The railroad tracks extend down the left side of the entire hole.
 |
| A look down the fairway from the 2nd tee box. |
There is a left side fairway bunker approximately 275 meters from the tee box. The hole has a large greenside bunker on the right 30 yards short of the green and two smaller bunkers on the left adjacent to the green.
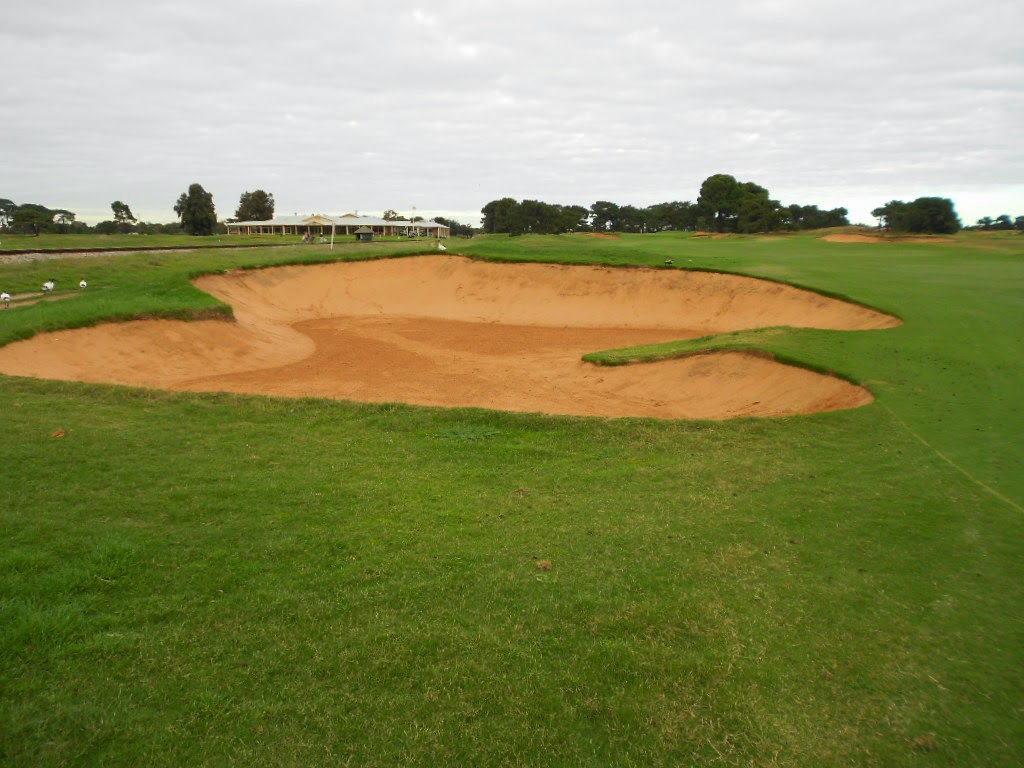 |
| A closer look at the large fairway bunker. |
 |
| A look into the 2nd green from 150 yards out. |
 |
| A closer look into the green from behind the fairway bunkers. |
Often regarded as one of the best holes at R.A.G.C., and one of my favorites of the day, this is the only hole which remains faithful to the original design of Dr Alister Mackenzie.
 |
| A look down the fairway from the 3rd tee box. |
It has a green which can be described as being “leg of mutton” in shape according to the R.A.G.C. description. It has an oblique ridge on the left, while on the right is a knoll on the side of the green. The green is always surrounded by dense grass and rushes.
 |
| A look into the 3rd green from 75 yards out. |
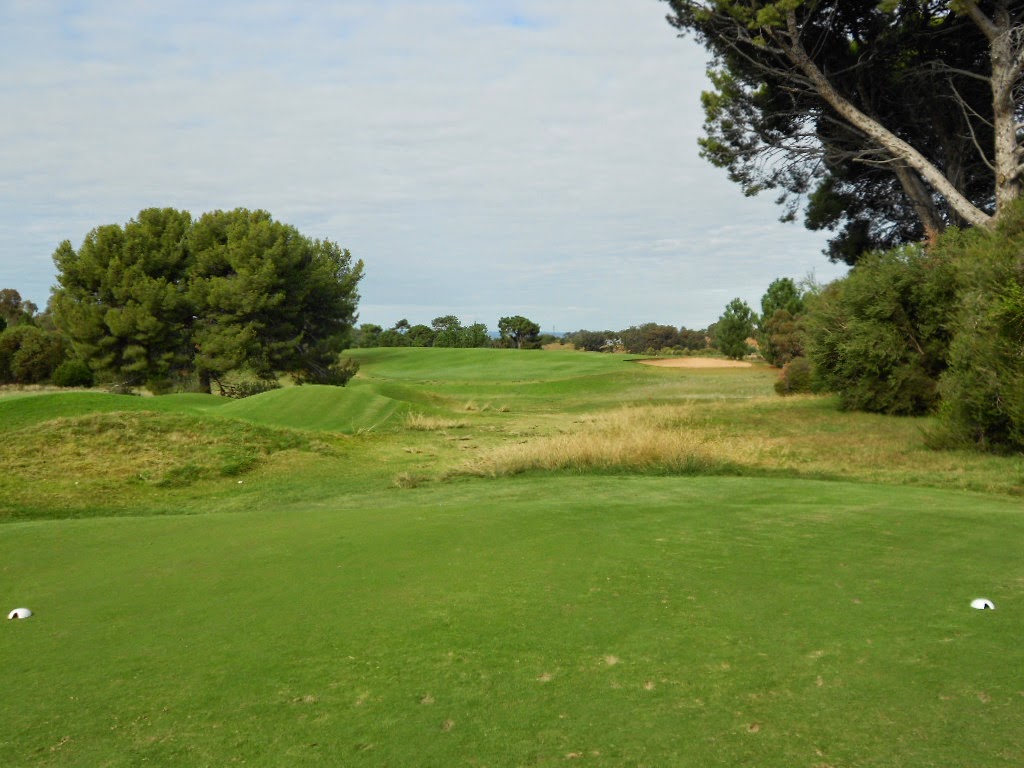
The tee shot at #4 is a blind shot to an undulating fairway. There is a tower to climb up so you can ensure the fairway is clear before teeing off. Pine trees guard both sides of the fairway.
 |
| A look down the fairway from the 4th tee box. |
After clearing the hill, you will find two deep bunkers on the left. For the longer hitter, there is another pot bunker a further 30 yards down the fairway. The right side of the fairway is heavily grassed and the fairway narrows sharply 280 yards from the tee.
 |
| A look down the fairway from the top of the hill. |
The green is relatively flat with a bunker on the left but there are some deceptive mounds on the right from which an accurate chip can be difficult.
 |
| A look into the 4th green from 200 yards out. |
 |
| A look down the fairway from the 5th tee box. |
On the left side of the fairway is some deep grass and a moderate size mounding between this and the neighboring sixth fairway. In these mounds are four bunkers which are invisible from the tee. The furthest of these is placed 290 metres from the tee and it narrows the neck of the fairway.
 |
| A look at the right side fairway bunkers from the middle of the fairway. |
The bunkers on the right side of the fairway are clearly visible from the tee box and are easily avoided with well placed second shots.
 |
| A look into the 5th green from just behind the right side fairway bunkers. |
 |
| A look down the fairway from the 6th tee box. |
A tee shot from the men's tee has to carry at least 220 yards to stay out of trouble. To the right are further mounds and some testing grass and rushes and another bunker 270 yards from the tee.
 |
| A look down the fairway from just after clearing the scrub brush. |
The green on this hole is fairly large. There is a deceptive slope from the back of the green. Two bunkers on each side of the green complete the hole.
 |
| A look into the 6th green from 100 yards out. |
 |
| A look into the 7th green from the tee box. |
The 7th green is surrounded by small bunkers in the front and on each side. Behind the green are several deep grassy hollows. Also, the green seems to slope a bit, leading to a chance your ball can roll back into the bunkers.
 |
| A closer look at the bunkers guarding the 7th green. |
 |
| A look down the fairway from the 8th tee box. |
The 8th hole presents two options of how to play the hole. You can choose to play short of rough extending across the fairway from the right. That side is reinforced by some steep mounds and a deep bunker. The left side is also mounded with two pot bunkers, but are easily overcome with careful shot management.
Alternatively, you can play a longer tee shot over the rough to a narrow strip of fairway. This leaves a very short pitch to the green which slopes away sharply on the left and behind. The front right is protected by two mounds and a bunker.
 |
| A look into the 8th green from 80 yards out. |
 |
| A look down the fairway from the 9th tee box. |
A moderate mound extends across the fairway to thick rough and a small stand of oaks trees. On the right, the rough is very thick and surrounds the two deep bunkers. Both sides of the approach to this hole are lined with bunkers.
 |
| A closer look at the right-side fairway bunkers. |
There is also a bunker that protects the left side of the green, and the green slopes that way, making for a risky play if you don't hit to the right side of the green.
 |
| A look into the 9th green from 150 yards out. |
 |
| A look down the fairway from the 10th tee box. |
The drive to the fairway is over a hill that hides the green. The fairway is angled to the right over the hill. A pine tree on the left and long grass on the right gives a slicer even more to worry about. At the bottom of the hill there is an area of thick rough that comes into play around 250 yards.
 |
| A look down the fairway from the top of the rise. |
The green has an inverted saucer shape with some very demanding pin placements. An accurately placed second shot will help combat the damage the green can do to your scorecard.
 |
| A look back to the 10th green from the slope behind it. |
 |
| A look down the fairway from the 11th tee box. |
This hole is regarded as Royal Adelaide’s signature hole and still plays as Alister Mackenzie designed it in the 1920s. The tee shot is uphill an over a bunker planted directly in the center of the fairway. There are also three fairway bunkers that make the drive more difficult.
 |
| A look down the fairway from the top of the rise. Bunkers guard both sides so stay straight. |
The green set within a sand crater and protected protected by both a front left and a front right sand bunker and is framed by a stand of pine trees on the rear sand dunes.
 |
| A look into the 11th green from 100 yards out. |
The 12th hole is played from an elevated tee. The green has gently undulates toward a low-lying swamps. A small bunker on the front left can also come into play if not careful.
 |
| A look into the green from the 12th tee box. |
 |
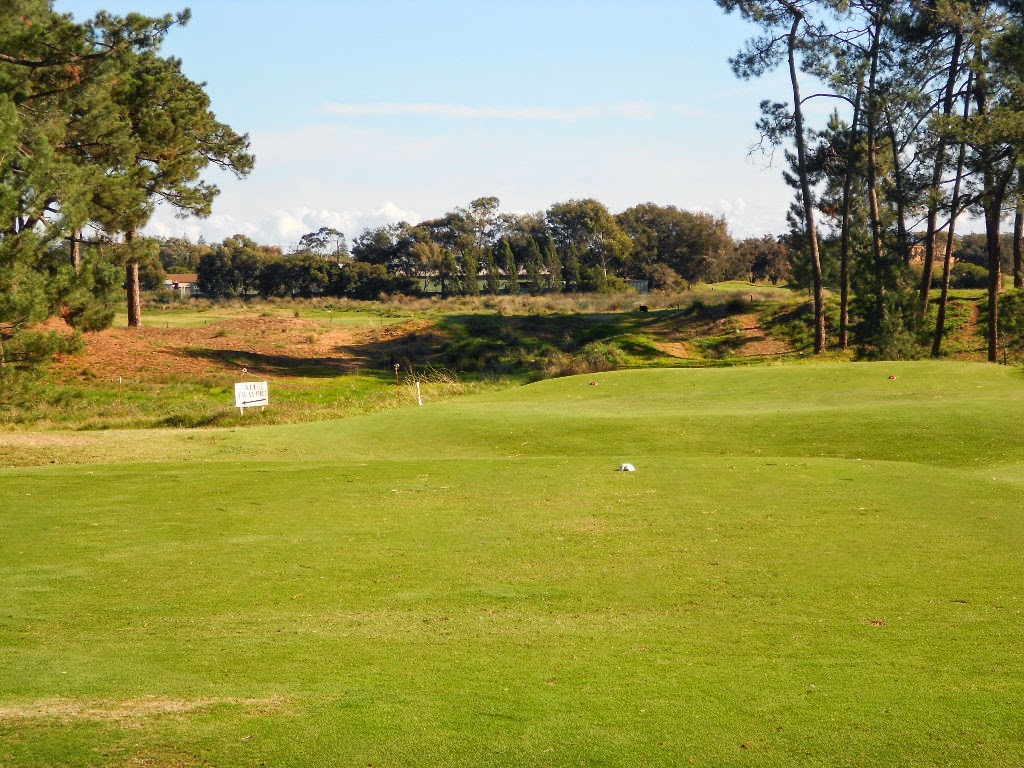
| A look down the fairway from the 13th tee box. |
The green is hidden from view while standing on the tee box due to being a dog-leg to the left. The left side of the fairway has a heavily grassed verge separating it from low sand hills. The right side has low mounds which also have heavy rough.
 |
| A look towards the green at the turn of the dogleg. |
There is a bunker 30 yards short of the green and a left green-side bunker. The green has a pronounced slope to the right which can make for a very difficult time of sticking the ball close to the pin.
 |
| A look into the 13th green from 100 yards out. |
 |
| A look down the fairway from the 14th tee box. From the men's tees, you have to hit back across the railroad tracks. |
You will need a 250 yard drive to carry the edge of a cluster of bunkers on the right. The second shot is played through a gap in the pine trees to an elevated green guarded by three bunkers.
 |
| A cluster of right-side fairway bunkers can come into play on a long drive. |
 |
| A look into the 14th green from 140 yards out. |
A deep swale in front of the green, and another on the left side of the green, make finishing this hole with a good score a tough challenge.
 |
| A look into the green from 75 yards out. |
 |
| A look down the fairway from the 15th tee box. |
The stand of pine trees on either side of the open space you are looking to place your drive can prove intimidating. A mishit left or right is going to make this long hole near impossible to score a par.
 |
| A look down the fairway after clearing the pines. |
The left side of the fairway is heavily trapped with numerous bunkers. Another bunker is also situated on the right across the fairway. Shorter and to the right there is very difficult rough. The green is lightly trapped with shallow bunkers.
 |
| A look into the 15th green from 130 yards out. |
This hole was one of the most difficult of the day for me. The green has some slight, but difficult slopes, and is complemented by a swale on the right and two bunkers on the left.
 |
| A look into the green from the 16th tee box. |
 |
| A look down the fairway from the 17th tee box. |
Cross bunkers come into play immediately off the tee. An approach from either the left or the right is possible, but the right side gives a better look into the green.
 |
| A closer look at the cross bunkers that protect the approach to the green. |
 |
| A look down the fairway from the 18th tee box. |
An accurate tee shot is important due to three little pot bunkers down the left side. On the right, a deep fairway bunker can also present a difficult challenge.
The rough on each side is troublesome and the fairway is narrow. There are two bunkers on the right of the green and a lateral water hazard on the left. The slope between the green and the hazard was closely cut on the day I played. Any shot to the left of the green may be in peril of getting wet and losing a stroke.
 |
| A look towards the 18th green from 200 yards out. |
Even though I started the blog slightly negative, I do have to give Royal Adelaide its due. Had it been the first course I played on my Australia and New Zealand trip, I would have likely enjoyed it much more. However, having to compete with Royal Melbourne, Cape Kidnappers, Kauri Cliffs, and Kingston Heath, it just couldn't win that fight. If you find yourself in Adelaide on a nice day, give them a call to see if you can get on. But, it isn't worth going out of the way to play, especially if specifically traveling to Adelaide to just play the course.


No comments:
Post a Comment